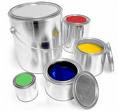
Glues and adhesives come in many types and have many uses. Special glues hold things together that cannot be fastened with nails or screws. There are many bonding agents available for use on certain materials. There are some multi-purpose glues and adhesives, but there is no one product that does it all. A handyman carries a variety of adhesives suited for different uses.
Hot Melt Adhesive
Hot melt adhesive is fast setting, but it is not a very strong adhesive and it must be applied thickly. It is not ideal for certain woodworking projects where a strong bond and a nice looking finish are required. It is good for some craft projects or for preliminary gluing to hold things together for fastening with screws or nails. There are many types of hot melt adhesives that are stronger than hardware or craft store products. Seaming tape used by carpet installers is one example.
Hot glue guns are very easy to use. Plug the gun in and allow time for it to heat up then squeeze the trigger to apply the adhesive. Be very careful; the glue is very hot and can cause serious burns. Press the parts to be glued together and hold or clamp till set.
If the glue stick doesn’t feed properly, it may need a push. Feeding too much at once causes the mechanism to slip against the stick until more of the glue melts. If the stick is almost used up, the gun may need a second stick to push the first through.
The setting times of different hot glues can vafry. Some dry almost instantly, making it impossible to reposition the parts to be glued. This type is useful when speed is important. Slower setting glues are better when it may take time to position the parts.
Hot glue must be applied thickly and sticks best when not squeezed too thin, so it is not appropriate for fine woodworking. There are stronger glues designed for this purpose that allow for the repositioning time needed to apply clamps.
Epoxy Adhesives
Epoxy adhesives are a two-part plastic resin glue that will set quickly and produce a very strong bond. The resin and hardener chemically react when mixed to produce a strong bond to most any clean surface. There are also one-part epoxy glues that are designed for professional use. Heat is used to start the setting reaction rather than a chemical hardener.
Epoxies set hard and fill gaps, adding strength and stiffness to parts being glued, which is great for some materials, but not appropriate for non-rigid materials such as fabrics and flexible plastics. Epoxies are OK for wood, but in some cases wood glue is a better choice, unless a quick set is necessary.
Epoxies are used to set bolts in concrete floors to stabilize vibrating machinery and for some types of plumbing repairs. Various metal additives are used in some epoxies for material compatibility. Steel, aluminum, bronze or titanium may be added for repairs to metals. Other epoxy fillers are used for restoring strength to rotted wood or wood damaged by carpenter ants and termites.
Wood Glue
There are many types of wood glue designed to set slowly or quickly depending on the project and your needs. Wood glue sets thin so there no gaps between parts. It is available for interior and water resistant, exterior use. The three basic types of wood glue are PVA (polyvinyl acetate), polyurethane and hide glue.
PVA glues are the traditional wood glues and the most commonly used. They provide a strong bond between wood products but will not bond strongly to other materials such as metal or plastic. It is important to use clamps to hold parts firmly until the glue dries and sets. Any movement during setting time will cause breaks in the bond. PVA’s do not stick well to other glues, so they are not useful in repairing furniture where old glue is the problem. Though the directions will say to remove all old glue before use, this is difficult or impossible to do efficiently for a long lasting repair.
PVA’s are not suitable as a primary adhesive for edge gluing or joining boards to create a wide surface like a table or countertop. Without other fasteners like screws, nails or dowels, they will eventually break apart. PVA glue is not completely waterproof; however, some PVAs are water and mildew resistant.
Polyurethane Glue
Polyurethane glue is one of the best waterproof glues available. It will adhere to wood, metal, stone, ceramic and plastics. It reacts chemically with moisture in the objects being glued, causing expansion and filling cracks for strong, solid glue joint. If products being glued are dry, lightly moisten them to promote this chemical reaction.
With polyurethane glue you will get better results when sanding or staining that with other wood glues. Most other adhesives act as a sealer and do not accept stain. Polyurethane glue has a longer setting time than other glues, allowing time for adjusting clamps and repositioning parts to be glued.
Polyurethane glue has its drawbacks. It expands, causing a mess when it oozes from the glue joint. It is not as easily wiped away as other wood glues, and it’s messy to use. It’s best to wear latex glove when working it or your hands will quickly become sloppy and sticky. Keep alcohol handy for clean up and wiping excess glue away as you work. Once it is dry, it is very difficult to remove and must be cut or sanded away. If it dries on your skin, you can use an abrasive soap, or just wait until it eventually wears off.
Polyurethane has the tendency to harden in the container, once opened, making it difficult to store and use later. This is because moist air becomes trapped in the container. You can try pouring a small amount of mineral spirits into the container when storing, but do not forget to pour it off before using.
Hide glue
Hide glues are made from animal products and are great for making cabinets and furniture. They are available in different setting times for different projects. Some projects require a slower setting time to allow for adjustments. Once set, it is very strong and durable. Hide glues can be reactivated with moisture. When restoring furniture you can remove the old glue with steam. This sensitivity to moisture can cause furniture to fall apart if it is stored in damp areas. The finish applied to furniture will help to prevent this reaction.
Hide glue is not generally available in hardware stores. It is difficult to use and doesn’t have a very long shelf life. It requires heating and mixing to get the right consistency for the job. It has almost become obsolete due to the availability of many other glue products for the average do-it-yourselfer.
Contact Adhesive
Contact adhesive, also known as contact cement, is a special adhesive for gluing nonporous materials. It is commonly used for attaching laminate to particle board for kitchen and bathroom countertops. It works for this purpose because it dries by quick evaporation of a flammable solvent. Other glues would require clamping the materials for a very long time as moisture from the glues would not be able to easily escape for drying and setting. Contact adhesives are already dry before assembly, so this does not create a problem.
Once applied and allowed to dry, the parts can be assembled in minutes and used immediately. There is no room for error; once stuck, it’s stuck for good, leaving no opportunity for repositioning, so careful planning is crucial for a successful finish. Disassembly of glued parts requires damaging the parts.
Follow instructions carefully when using this product. Some materials require a priming coat of adhesive to pre-seal the material to create a strong bond. Problems result from not allowing the adhesive to dry fully before assembly or waiting too long before assembly. Applying too much or not enough also causes a problem.
Some adhesives are flammable; others can emit harmful fumes and require proper ventilation. Some adhesives are only designed to be used with certain materials and can be caustic to other materials. Some adhesives can be harmful if they come into contact with your skin. Use the right adhesive for the right project and follow all instructions to avoid injury to your self or damage to the materials you’re working with.
These tips are being provided by Paul Doughty, owner of HandyPro Handyman Services in El Paso County, Colorado. HandyPro Handyman Services is a one-stop professional, honest and trusted handyman service that does a wide variety of jobs, large and small; all with high-quality, professional workmanship.
Paul Doughty performs minor repairs and improvements for homeowners and associations, businesses, apartment complexes and condominiums in Manitou Springs, Fountain, Monument, Colorado Springs and nearby cities and communities in El Paso County, Colorado.
80829, 80817, 80132, 80902, 80903, 80904, 80905, 80906, 80907, 80908, 80909, 80910, 80911, 80912, 80913, 80915, 80916, 80917, 80918, 80919, 80920, 80921, 80922, 80923, 80924
Saturday, December 26, 2009
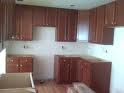
Handyman Services: Tips for Installing New Cabinets
Do you wish you had more cabinet space? Cabinets improve functionality while adding style to your kitchen, bathroom, utility room, basement and garage. Installing cabinets isn’t as difficult as you might think, so gather your tools, seek the help of an assistant and make a place to hide the unsightly clutter.
Ready-made cabinets are the easiest for the handyman to install. They come in a wide variety of styles to suit your storage needs. Maybe you’re thinking of remodeling your kitchen. If so, you can always re-install your kitchen cabinets in the basement or garage to improve organization.
Begin with some preliminary planning and measuring before you go shopping for your new cabinets. Draw your plan on graph paper or use the computer-aided design programs available at many home improvement stores.
Ready made cabinets come in a wide variety of styles and features. Base units are typically 34-1/2 inches tall and wall units are available in heights of 15, 18, 25, 30, and 42 inches; and widths ranging from 9 inches to 48 inches, in 3 inch increments. Filler strips can be trimmed to accommodate any spaces if you are working on a space that is not a perfect multiple of 3 inches.
Think about your storage needs and decide how you want your finished project to look. Would a bank of drawers be easier to access, or do you prefer shelves? Think about the size of the items to be stored and place the shelves accordingly. Most cabinets are made with adjustable shelves.
You will need a 6 or 8 foot leve, a stud finder, a drill, a soft rubber mallet, some clamps, measuring tape, pencil to mark plumb lines and some basic hand tools. A small pry bar will be helpful in removing the old cabinets, especially if you plan to re-install them in the basement or garage. Use a hole saw for cutting holes for water supply lines if you’re installing a sink cabinet.
Carefully remove the old cabinets, to prevent damage to them or the walls. Once you have the room ready for installing the new cabinets, set them out to inventory what you have and plan where they will be placed.
The job can be a little bit complicated if you need to disconnect plumbing or utility hook-ups, or relocate a sink. Typically, in a kitchen, the sink is centered under a window with cabinets on both sides, making this a good starting point. If you’re installing a corner cabinet, some contractors will make this their starting point. Even the professional handyman will say there is more than one correct approach to this type of project.
Starting with the higher, wall cabinets is a good idea, so you’re not reaching over the lower cabinets to work. This also reduces the risk of damaging the newly installed cabinets. Work with an assistant to make the job easier. Attach a temporary ledger board to rest the back of the cabinet on and use T-Jaks to level the cabinet.
You might choose to begin with the base cabinets and use them to support a shorter jack to hoist the wall cabinets. Be sure to protect the base units with a heavy blanket or padding to prevent damage to them. Remove doors and drawers to reduce the weight of the cabinets for easier maneuverability.
Before mounting cabinets, join two or more sections together. Lay wall units on their backs on a level surface and drive screws through the face frames. Be sure the surface is level, or use shims as you join the units to be sure the ends and faces are flush with each other. Use clamps to hold them firmly; adjust as needed by tapping with a soft mallet. Keep checking the alignment as you drive screws. Drive the screws into the stile on the hinge side of the cabinet where they will be less visible. Make sure the screws are the right length, as long as possible, but at least ¼ inch short of going through the stile when countersunk.
To mount the cabinets to the wall, start by supporting them with T-Jaks. Tack the unit to the wall with one screw, then make adjustments as necessary to be sure they are level; if necessary, add shims to the back of the cabinet where you will be attaching it to the wall. For cabinets with glass doors, place the screws strategically so they are less visible. Use flathead wood screws rather than drywall screws for best results.
Every handyman knows that houses settle over time; floors and walls are rarely plumb and level, so expect to add shims to compensate for these imperfections. Level base cabinets from side-to-side and front-to back, inserting shims where necessary. Be sure to adequately support spaces under joints where two units come together. Make sure corners are square and tops and fronts of all units are flush and level to support the countertop. Use a utility knife to score and snap off the excess shims after attaching the cabinets to the wall.
Sink cabinets are a lot of fun for the handyman. Be sure to accurately measure and cut openings in the cabinets for the water supply lines. Mark the holes by making very careful measurements. A good handyman says “measure twice, cut once” to avoid error. Start by drilling a pilot hole in the center of each circle, then use a hole saw to avoid splintering. For the drainpipe, cut out an oval opening from the outside of the cabinet, so you can slide the unit in place over the two water supply lines.
Finish the job by using pre-finished toe-kick boards which are sold in 8-ft lengths or use ¼ inch plywood, cut to size and finished to match the cabinets. Attach the toe-kicks with silicone adhesive caulk and secure with finish nails. Miter the corners and touch up the ends with stain to match the finish.
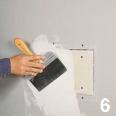
There are a variety of techniques a handyman will use to hide gaps and imperfections. I’ve heard a handyman say “a little bit of caulk and paint makes the carpenter what he aint!” Use Minwax Color Putty on joints between components and in nail holes for a nice finished look. Simply rub the putty in with your finger and buff the area with a soft cloth. Use paintable caulk where the cabinet meets the wall, or apply a strip of scribe molding along the edge. Adding a crown molding will enhance the cabinets for a quality look. A continuous crown adds style and makes several units look like a single unit.
Careful planning and proper preparation when purchasing and installing your cabinets will ensure a great looking room for years to come. Take your time and don’t cut corners and your cabinets will provide beauty and organization for your home, not to mention future re-sale value.
Paul Doughty owns HandyPro Handyman Services, specializing in minor repairs and improvements for homeowners and businesses, apartment complexes and condominiums in Colorado Springs, Manitou Springs, Fountain, Monument, and neighboring cities and communities in El Paso County, Colorado and neighboring cities and communities.
80829, 80817, 80132, 80902, 80903, 80904, 80905, 80906, 80907, 80908, 80909, 80910, 80911, 80912, 80913, 80915, 80916, 80917, 80918, 80919, 80920, 80921, 80922, 80923, 80924
Ready-made cabinets are the easiest for the handyman to install. They come in a wide variety of styles to suit your storage needs. Maybe you’re thinking of remodeling your kitchen. If so, you can always re-install your kitchen cabinets in the basement or garage to improve organization.
Begin with some preliminary planning and measuring before you go shopping for your new cabinets. Draw your plan on graph paper or use the computer-aided design programs available at many home improvement stores.
Ready made cabinets come in a wide variety of styles and features. Base units are typically 34-1/2 inches tall and wall units are available in heights of 15, 18, 25, 30, and 42 inches; and widths ranging from 9 inches to 48 inches, in 3 inch increments. Filler strips can be trimmed to accommodate any spaces if you are working on a space that is not a perfect multiple of 3 inches.
Think about your storage needs and decide how you want your finished project to look. Would a bank of drawers be easier to access, or do you prefer shelves? Think about the size of the items to be stored and place the shelves accordingly. Most cabinets are made with adjustable shelves.
You will need a 6 or 8 foot leve, a stud finder, a drill, a soft rubber mallet, some clamps, measuring tape, pencil to mark plumb lines and some basic hand tools. A small pry bar will be helpful in removing the old cabinets, especially if you plan to re-install them in the basement or garage. Use a hole saw for cutting holes for water supply lines if you’re installing a sink cabinet.
Carefully remove the old cabinets, to prevent damage to them or the walls. Once you have the room ready for installing the new cabinets, set them out to inventory what you have and plan where they will be placed.
The job can be a little bit complicated if you need to disconnect plumbing or utility hook-ups, or relocate a sink. Typically, in a kitchen, the sink is centered under a window with cabinets on both sides, making this a good starting point. If you’re installing a corner cabinet, some contractors will make this their starting point. Even the professional handyman will say there is more than one correct approach to this type of project.
Starting with the higher, wall cabinets is a good idea, so you’re not reaching over the lower cabinets to work. This also reduces the risk of damaging the newly installed cabinets. Work with an assistant to make the job easier. Attach a temporary ledger board to rest the back of the cabinet on and use T-Jaks to level the cabinet.
You might choose to begin with the base cabinets and use them to support a shorter jack to hoist the wall cabinets. Be sure to protect the base units with a heavy blanket or padding to prevent damage to them. Remove doors and drawers to reduce the weight of the cabinets for easier maneuverability.
Before mounting cabinets, join two or more sections together. Lay wall units on their backs on a level surface and drive screws through the face frames. Be sure the surface is level, or use shims as you join the units to be sure the ends and faces are flush with each other. Use clamps to hold them firmly; adjust as needed by tapping with a soft mallet. Keep checking the alignment as you drive screws. Drive the screws into the stile on the hinge side of the cabinet where they will be less visible. Make sure the screws are the right length, as long as possible, but at least ¼ inch short of going through the stile when countersunk.
To mount the cabinets to the wall, start by supporting them with T-Jaks. Tack the unit to the wall with one screw, then make adjustments as necessary to be sure they are level; if necessary, add shims to the back of the cabinet where you will be attaching it to the wall. For cabinets with glass doors, place the screws strategically so they are less visible. Use flathead wood screws rather than drywall screws for best results.
Every handyman knows that houses settle over time; floors and walls are rarely plumb and level, so expect to add shims to compensate for these imperfections. Level base cabinets from side-to-side and front-to back, inserting shims where necessary. Be sure to adequately support spaces under joints where two units come together. Make sure corners are square and tops and fronts of all units are flush and level to support the countertop. Use a utility knife to score and snap off the excess shims after attaching the cabinets to the wall.
Sink cabinets are a lot of fun for the handyman. Be sure to accurately measure and cut openings in the cabinets for the water supply lines. Mark the holes by making very careful measurements. A good handyman says “measure twice, cut once” to avoid error. Start by drilling a pilot hole in the center of each circle, then use a hole saw to avoid splintering. For the drainpipe, cut out an oval opening from the outside of the cabinet, so you can slide the unit in place over the two water supply lines.
Finish the job by using pre-finished toe-kick boards which are sold in 8-ft lengths or use ¼ inch plywood, cut to size and finished to match the cabinets. Attach the toe-kicks with silicone adhesive caulk and secure with finish nails. Miter the corners and touch up the ends with stain to match the finish.
There are a variety of techniques a handyman will use to hide gaps and imperfections. I’ve heard a handyman say “a little bit of caulk and paint makes the carpenter what he aint!” Use Minwax Color Putty on joints between components and in nail holes for a nice finished look. Simply rub the putty in with your finger and buff the area with a soft cloth. Use paintable caulk where the cabinet meets the wall, or apply a strip of scribe molding along the edge. Adding a crown molding will enhance the cabinets for a quality look. A continuous crown adds style and makes several units look like a single unit.
Careful planning and proper preparation when purchasing and installing your cabinets will ensure a great looking room for years to come. Take your time and don’t cut corners and your cabinets will provide beauty and organization for your home, not to mention future re-sale value.
Paul Doughty owns HandyPro Handyman Services, specializing in minor repairs and improvements for homeowners and businesses, apartment complexes and condominiums in Colorado Springs, Manitou Springs, Fountain, Monument, and neighboring cities and communities in El Paso County, Colorado and neighboring cities and communities.
80829, 80817, 80132, 80902, 80903, 80904, 80905, 80906, 80907, 80908, 80909, 80910, 80911, 80912, 80913, 80915, 80916, 80917, 80918, 80919, 80920, 80921, 80922, 80923, 80924
Subscribe to:
Posts (Atom)